How to Implement Self-Hosted CDN for Site Speed
CDN is an acronym for content delivery network. While a self-hosted CDN defeats the purpose of the acronym because it is no longer a network, there are advantages it can bring to further optimize your site speed.
This entry is the third installment to our series Ultimate Guide to Site Speed Optimization – the series is a complete run-through of what I did to optimize SEO-hacker.com’s site speed. Lowering it down to a minimum.
What Exactly is a CDN?
In simple terms, a CDN is meant to distribute your static content to your users from the nearest possible data center to their geographic location. This makes loading the heavy stuff quicker because it is retrieved from the nearest place. It keeps the data’s travel time to a minimum.
Other effects of CDN is that it lowers down your server’s bandwidth usage because you’re feeding a lot of your static content straight from the CDN’s servers. You are also lowering down the processing memory being used by your server/s because the static content is processed and fed through your CDN.
Now that you know that a CDN is served from several different servers (depending on which one is the closest to the user), what then is the purpose of a self-hosted CDN?
Advantages of a Self-Hosted CDN
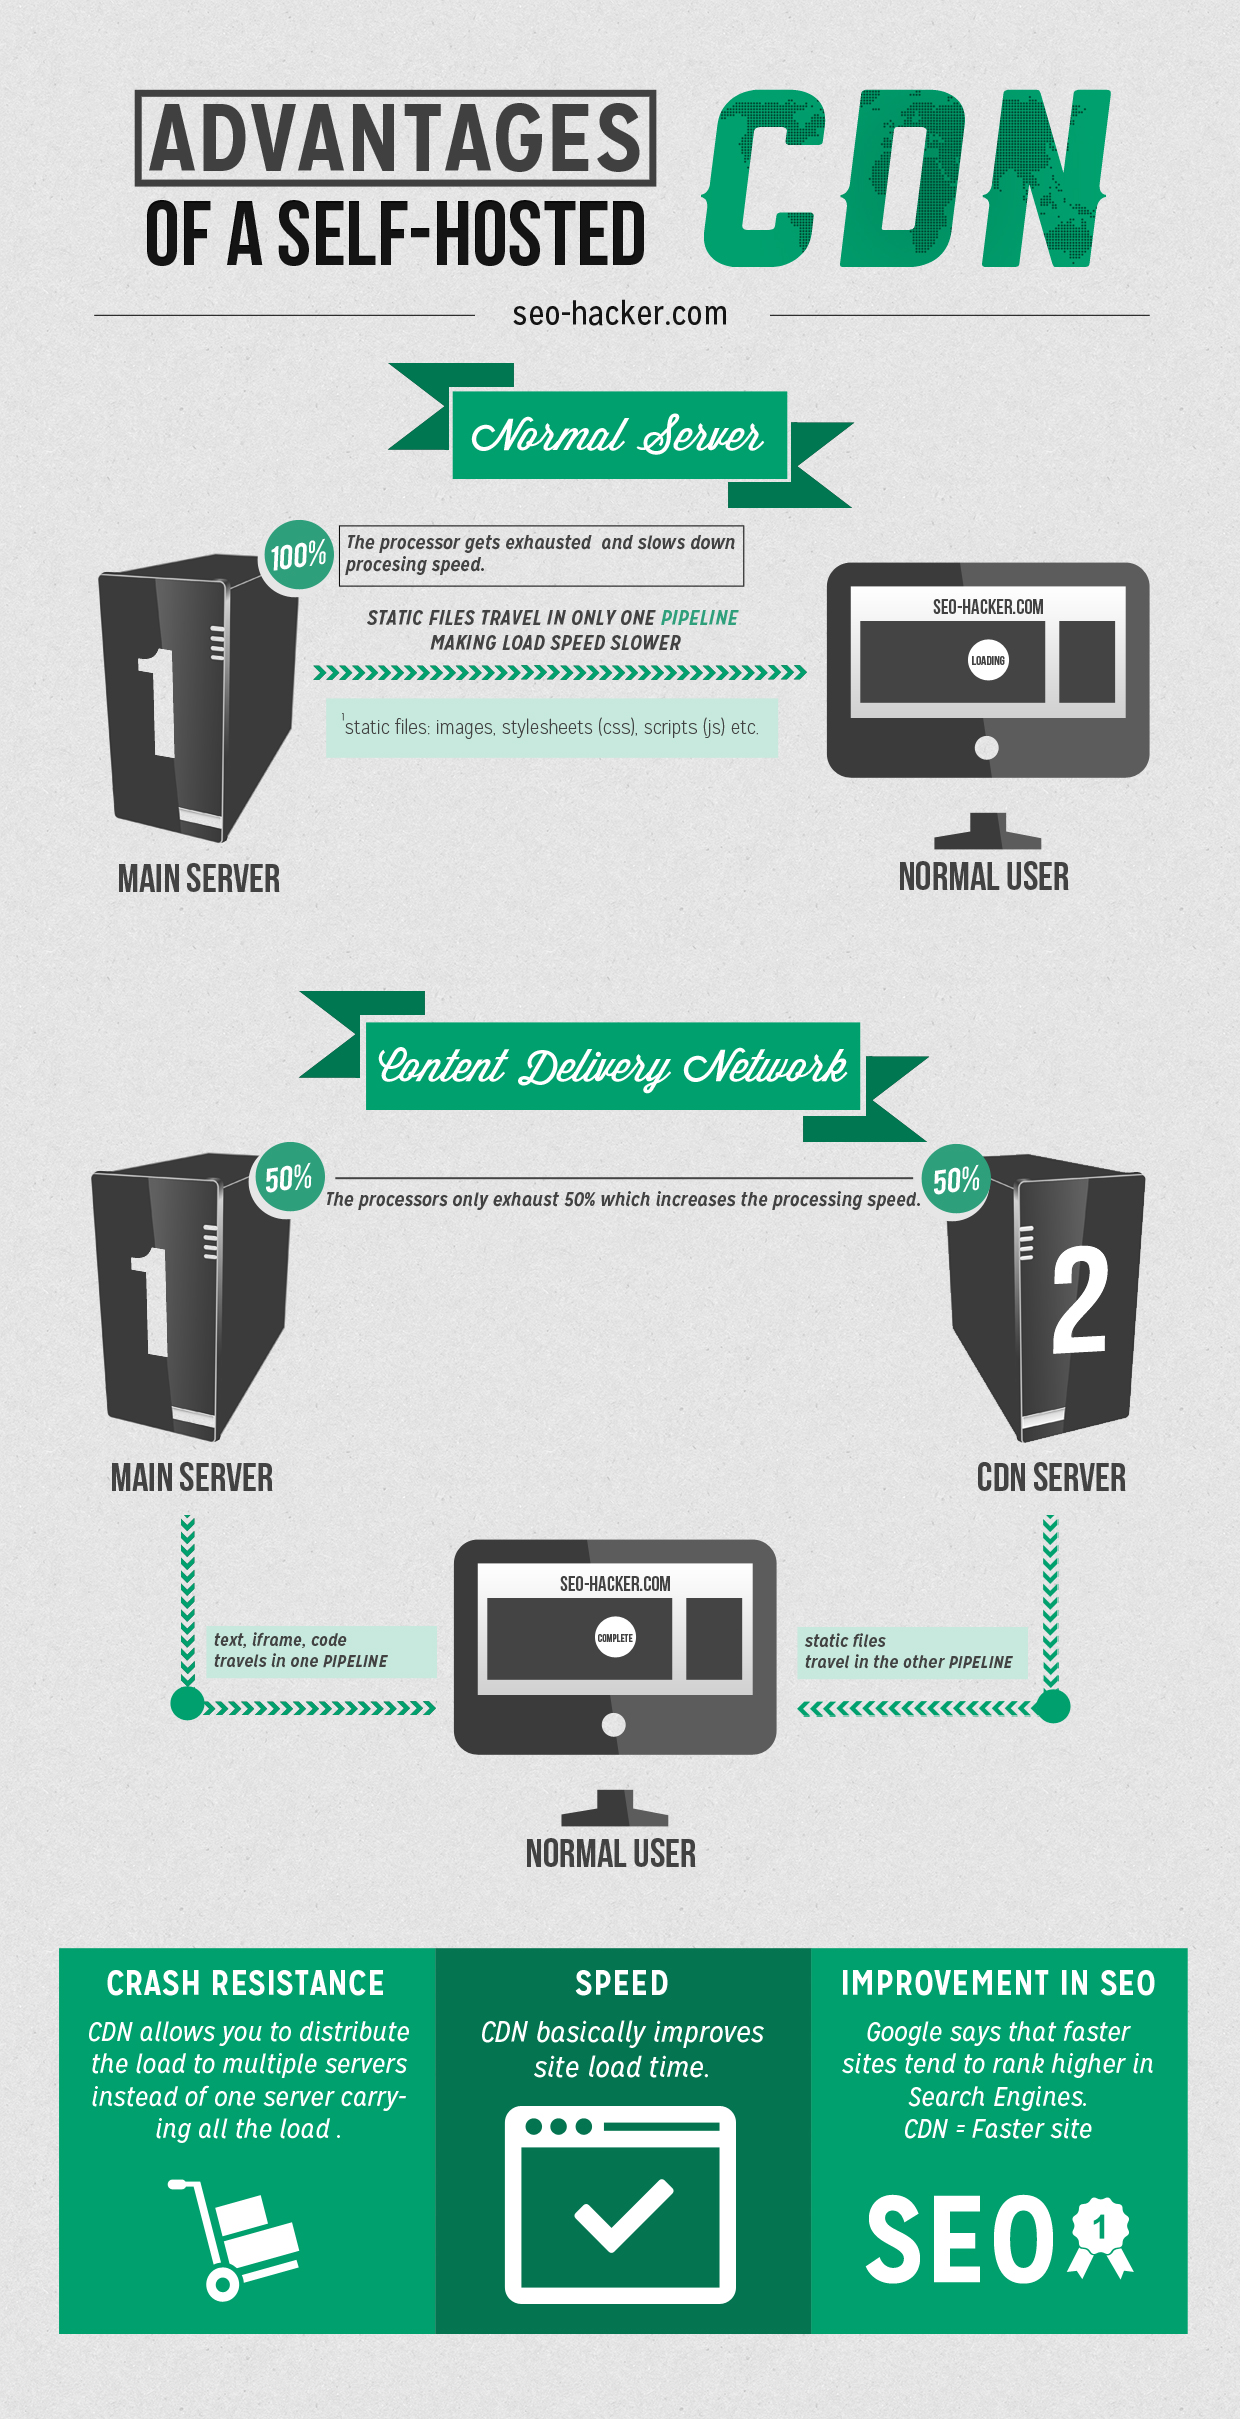
To put things in an extremely simple way, the main advantage of a self-hosted CDN is that it will enable your users to draw your static media files from another, potentially cookieless server. This additional pipeline will ease the burden of processing from your main server and allows them to download all your files simultaneously.
How do you Set-up your Self-Hosted CDN in 11 Steps
For this tutorial, I’ll be using the local server’s subdomain as the origin of the CDN files. First, off you’ll need the W3 Total Cache plugin. Download it here.
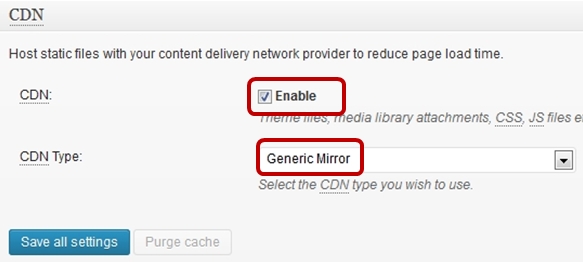
1) Turn the CDN feature on in the General Settings section and select Generic Mirror in the CDN Type
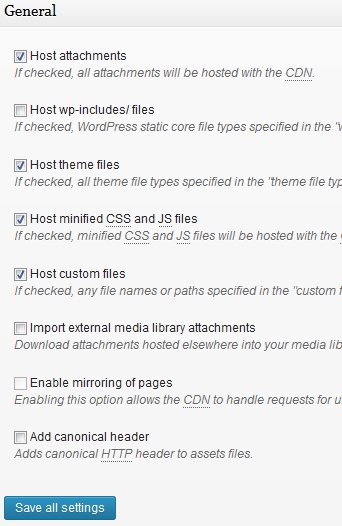
2) Next, go to your W3 Total Cache’s CDN settings. Here’s a screenshot of what options I turned on and which ones I left turned off in my CDN options
As much as possible, I want the static files such as image attachments, theme files, CSS and JS files to be hosted in the CDN so I ticked them on.
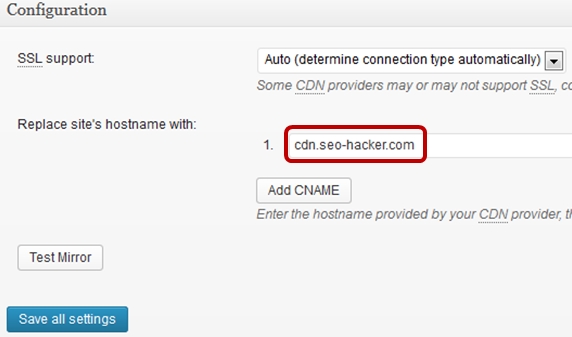
3) Change your CDN Hostname to your self-hosted CDN’s address. In this case, I used SEO-Hacker’s subdomain.
4) Login to your website’s cPanel and go to the subdomains section
 5) Fill up the Create Subdomain form with whatever you want to name your CDN’s subdomain. I named mine as cdn.seo-hacker.com
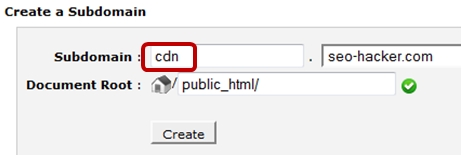 6) Make sure that you assign the CDN subdomain to your public_html folder so that it will function as a Generic Mirror
 7) Go to your cPanel’s Advanced DNS Zone Editor
 8) Edit the CNAME of the two new subdomains that you created. Click the edit button
 9) Change the Type to CNAME and then put your domain name in the CNAME, thus completing the Generic Mirror settings
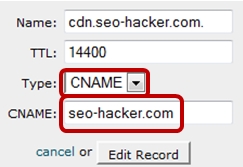 10) Next, go to your W3 Total Cache’s CDN settings and click on Modify Attachment URLS at the topmost part
11) Modify the Attachment URL to your subdomain and click on the Start button
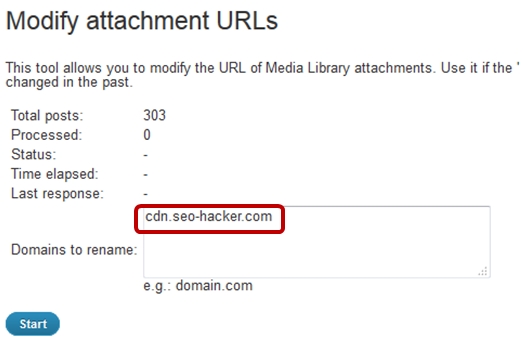 Wait for it to load. Close the window and voila! You have your new self-hosted CDN!
From now on, your website should be loading your static files from your subdomain. This will help unclog your pipeline from users siphoning all those static files from your main DNS.
Resources:
http://wordpress.org/support/topic/w3-total-cache-self-hosted-cdn-how-to-setup-the-subdomain

