Must-Have Site Speed Plugin for WordPress
It’s not too hard to optimize your site speed if you’re using WordPress. There’s this plugin called W3 Total Cache (W3TC). Let me teach you what to turn on and what you shouldn’t play with in the plugin’s settings. This is bound to increase your site speed by a good margin.
Note: This is the second post on our Site Speed Series. Read up on the introduction of this post – Ultimate Guide to Site Speed.
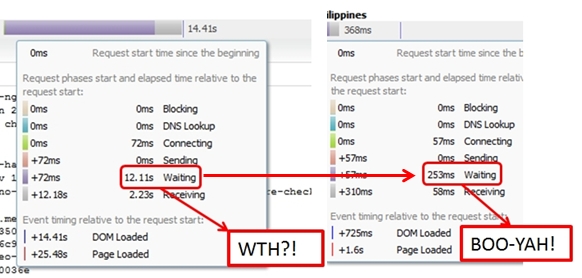
Let’s keep this short and simple. Here’s what improved from my end:
How W3 Total Cache Helped me out
While there are lots of features of W3 Total Cache, I’m currently just using these:
- Page, Object, and Browser Cache
- Minify
- Self-Hosted CDN (I’ll discuss this in the next entry of our series)
Important: Download W3 Total Cache here and I’ll run you through on each of the options.
Page, Object, and Browser Cache
Your webpage probably contains images, content, scripts, php codes, AJAX, iframes, and what have you. If your site is serving a lot of visitors, know that your server recreates each of those little things every time a user requests to access them – again and again and again. This can bog down your server. That’s what happened to me. I’m running a lot of scripts that made a lot of DNS lookups.
Ate up a lot of my processing speed which drove me crazy on finding a solution. If you didn’t know, here are two main reasons why caching is used:
- Caching Reduces Latency – A user will ping your cache (which is supposedly a representation of your website that is “closer” to them) instead of the origin server, it takes less time for it to get your webpage’s data and display it. This makes the Web seem more responsive.
- Caching Reduces Network Traffic – Your page’s “cached representations” are reused. Consequently, it reduces the amount of bandwidth you are using and consumes less processing speed.
Browser caching lets your users set aside a section of their computer’s hard disk to store representations of your page that they’ve just seen. The browser cache works according to fairly simple rules. It will check to make sure that the representations are fresh – usually once a session.
This cache is especially useful when users hit the “Back” button or click a link to see a page they’ve just looked at. Also, if you use the same navigation images throughout your site, they’ll be served from browsers’ caches almost instantaneously.
Since Object cache does not have much options (you just have to turn it on under General Settings), I’ll just take you to how to set-up Page and Browser caching options:
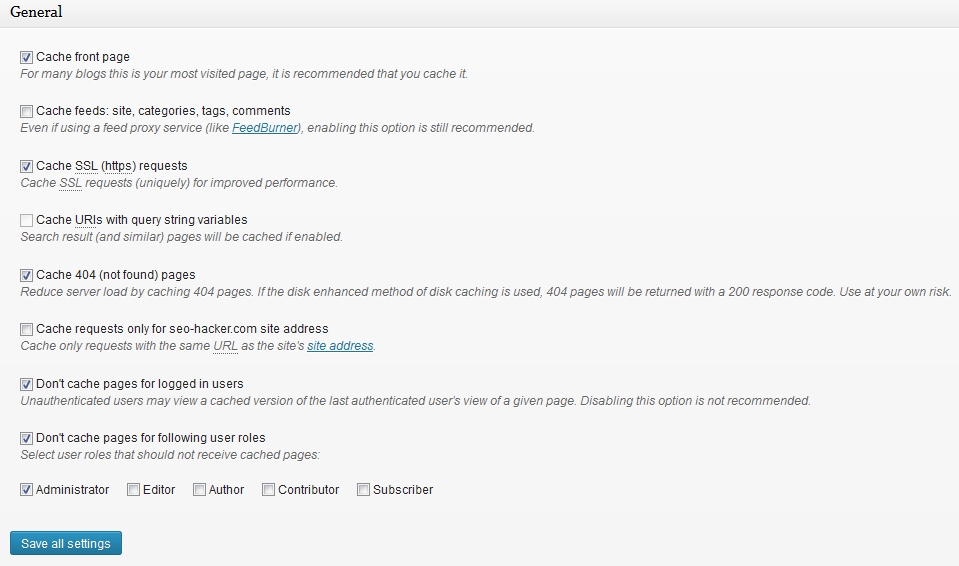
Here’s my Page Cache Settings:
Cache front page – This one’s a no-brainer. Front page MUST be cached.
Cache SSL (https) requests – Just because I have an SSL
Cache 404 (not found) pages – Still testing this out. So far, works fine for me.
Don’t cache pages for logged in users – I left Administrator out of the cache. That way, I get to check all the stuff in my site live.
These are the only options I tampered with. The ones below, I left untouched.
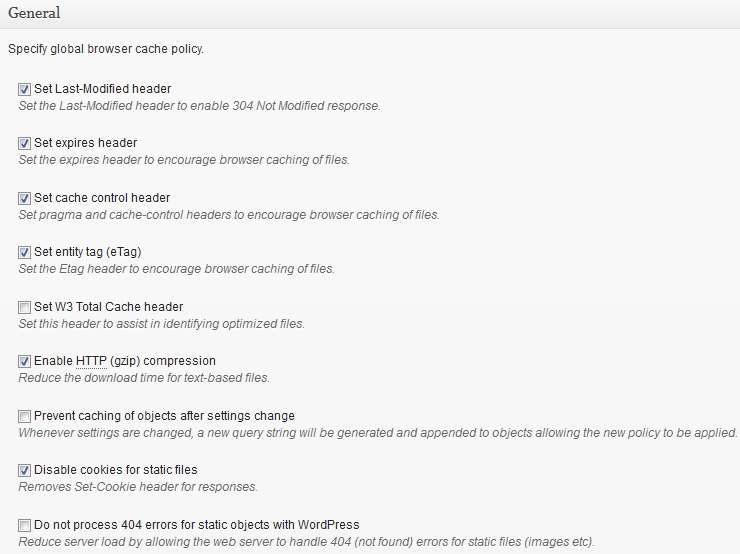
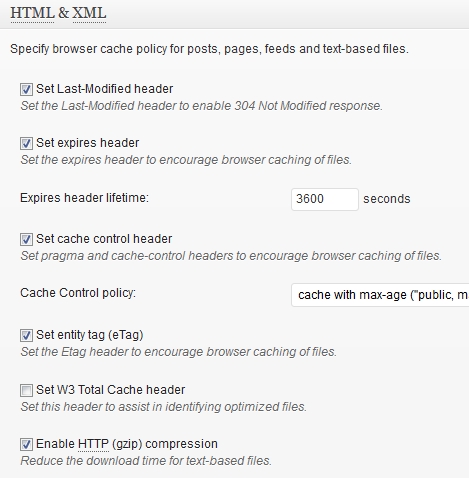
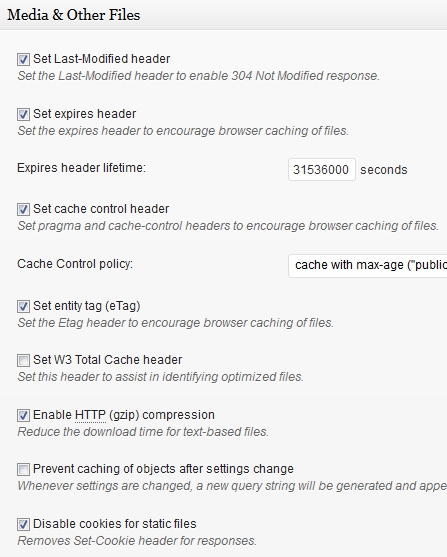
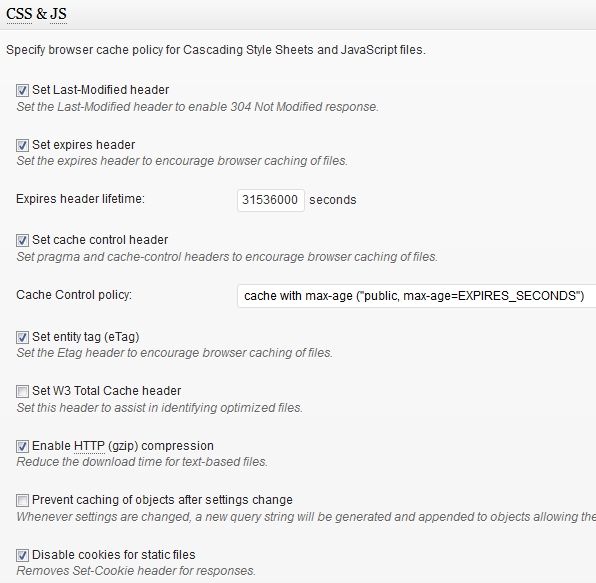
Here’s my Browser Cache settings:
So far all of these has worked to my site speed’s benefit. Not all of these can work for you and some may even affect your design. The thing with W3TC options is that you will almost always have to go through trial-and-error. Because each website is unique in its own way.
Minify
Minifying HTML, Javascript and CSS isn’t something new. However it can be quite effective – reducing file size by up to 50%. Minifying code is simply the act of removing spaces and packing all of the codes in such a way that it’s read continuously by your server to hand out to your users.
The thing with Minify is, it’ll be harder for you to debug code because of the missing spaces and line breaks. So Minify your stuff only after backing them up. Here’s how the Minification process looks like:
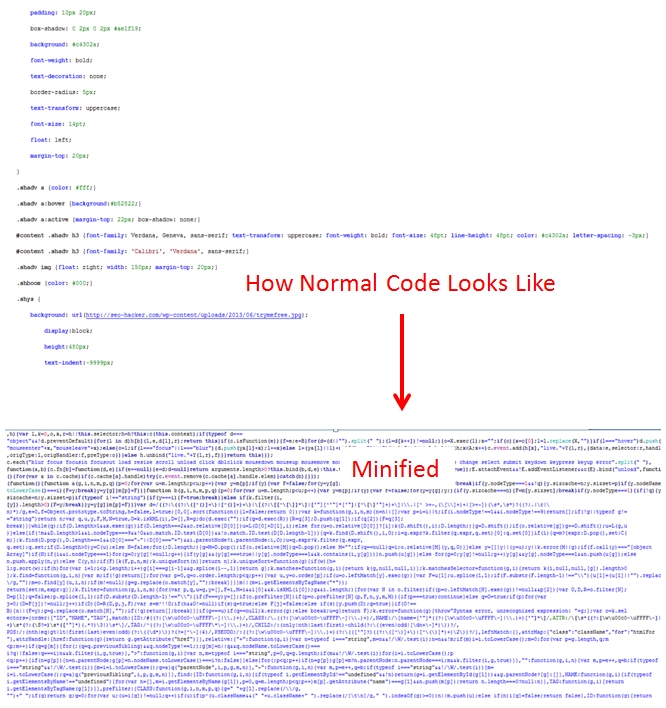
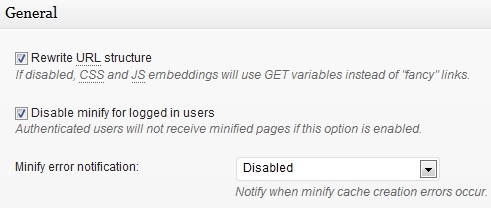
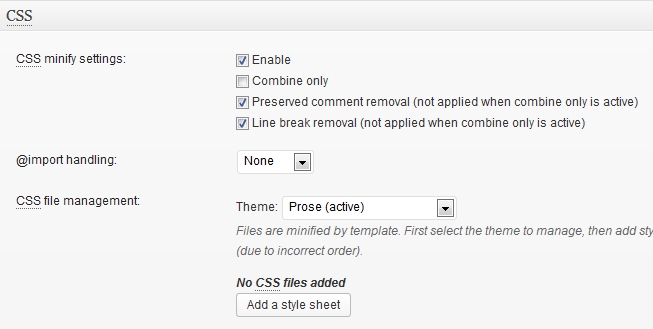
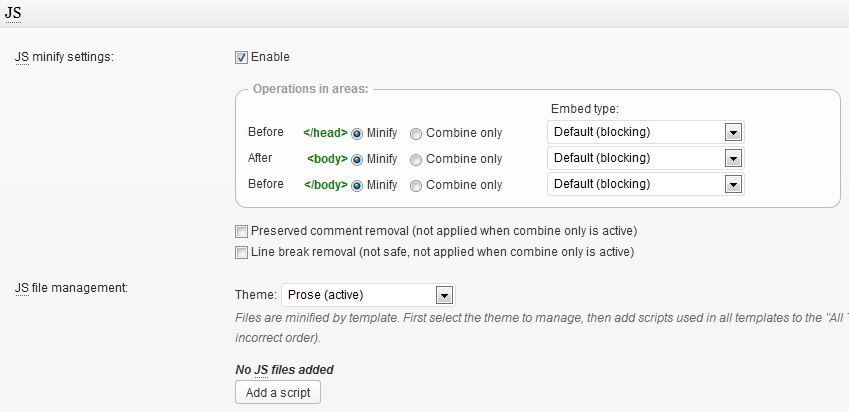
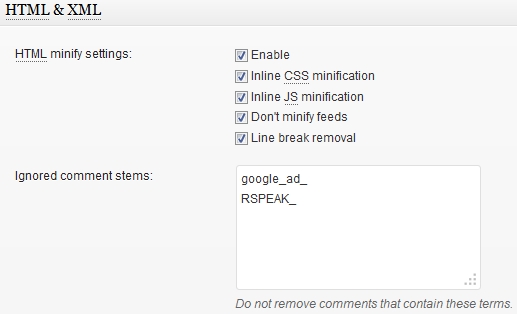
For my W3 Total Cache’s Minify Settings, here’s how I set it up:
Minifying your code is really really easy with W3TC. The thing is, it might affect some of your site’s functionalities. If you noticed I ticked on ‘Don’t Minify feeds’ however my site’s feeds still got affected.
What if my RSS feed got affected by W3 Total Cache?
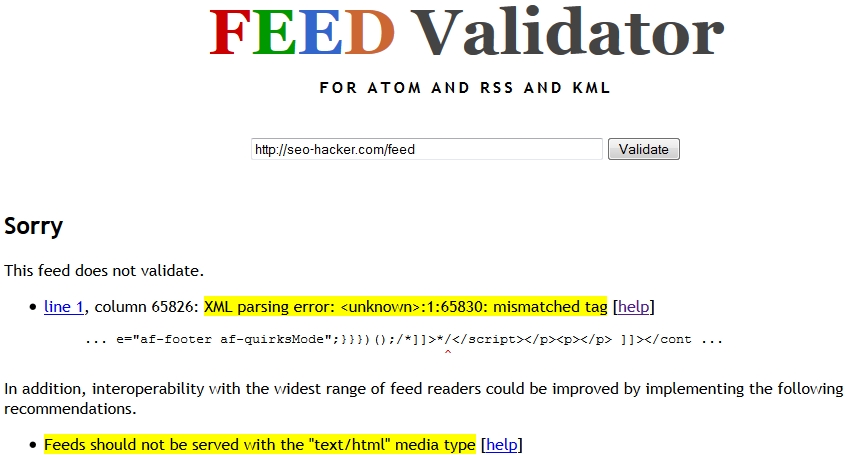
Mine did. Checked it on Feed Validator and I wasn’t able to have my feed validated successfully.
The good thing is, I found a workaround. Use Feedburner to validate your feeds. It’s really easy – just put in your existing feed URL.
Create a feed there even if your RSS feed fails validation, if you use Feedburner’s new feed URL for you (such as http://feeds.feedburner.com/seo-hacker) it will be validated successfully.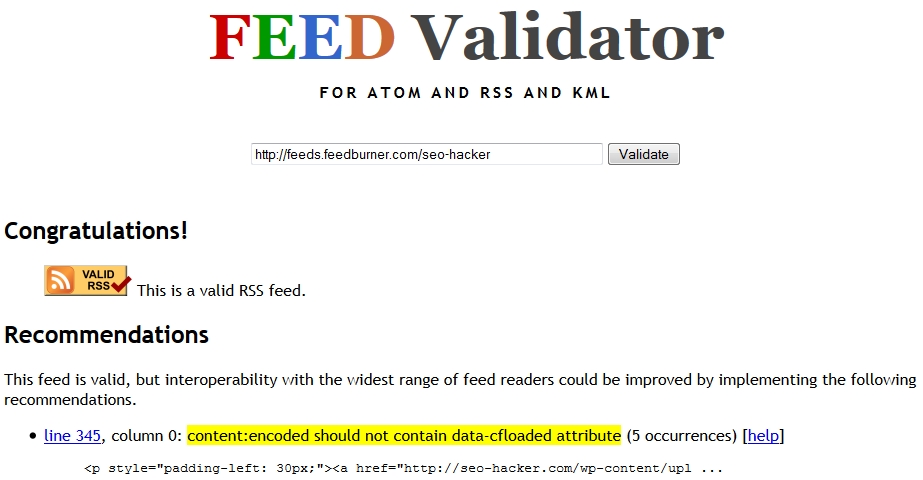
We still have a lot to talk about in the next parts of our series on site speed optimization but I want you to know that W3 Total Cache helped out big-time in the majority of the reduction in my site’s load speed. It’s a must if you want your site to load fast and consume less processing speed from your server. Apply it and test your site speed out on GTmetrix and Pingdom and see how your site speed fares.
