10 Must-know Image SEO Best Practices

With so many things to think about in SEO, people tend to forget about the importance of image SEO and the value that it could bring to a website. As a result, images are only added just for designs and to accompany articles barely having any optimizations.
When Image SEO is mentioned, most would think about alt text and that’s it. Well, I hate to break it to you, but there is more to image SEO than just alt texts.
Take note that SEO is not just the 10 regular links you see in the search results. There are also videos, news, shopping, and of course, images. By not optimizing images on your website, you are wasting so many opportunities that could bring your website more traffic, backlinks, and give users a better experience.
In this post, I will break down all the best practices that you must follow for image SEO.
1. Use Original Images
If you’re using a stock photo on your article guess what, a lot of people are probably using it too! That’s the reason why I put this so high on the list because if you’re using stock photos most of the time, you’ll only be wasting time doing the rest of the best practices for images on this list.
If you’re optimizing for image SEO, you would want your image to appear at the top of the Google image results. If you’re using a stock photo, you can’t expect to outrank the website that hosts the stock photo that you used.
Invest some time to take original photos of your products or service in action. Not only will this give you more assets for image SEO but also would provide your users with a good experience.
2. Choosing the Image Format
There are so many image types to choose from but the most common ones used for websites are JPG and PNG – both of them have their own pros and cons.
A JPG image has a lower file size but the quality is compromised. When you convert an image to JPG, some of the information in the photo is permanently deleted allowing for lower file size. On the other hand, PNG images have higher quality but the file size is much bigger as well.
If you compare them side by side, you really can’t tell the difference between a PNG and a JPG image. So which of the two should you choose?
There’s actually no right answer here. It all depends on your needs. JPG is most commonly used for photos that have large file sizes such as photos from professional cameras. PNG is commonly used for graphics and screenshots.
Personally, I prefer using JPG most of the time because I choose to prioritize loading speeds.
Now if you really want to put in the extra work, you might as well use next-gen image formats: JPEG 2000, JPEG XR, and WebP. These new image formats have much higher quality and better compression. However, not all browsers support these new formats. For example, the latest versions of Chrome and Firefox support WebP but are not able to support JPEG 2000 and JPEG XR. Currently, WebP is the format that is supported by the latest versions of most popular browsers. You can convert images to WebP by going to WebP Converter. Now is really a good time to test these new formats and see how well they perform on your website so you can be prepared for the future.
3. Optimize Image File Name
The image file name is often omitted by many thinking that alt text is the only thing used by Google to understand what an image is about. But in fact, the file name is crucial too and it is one of the first things Google looks at.
Here’s a photo of me of the time I spoke for Tedx here in Manila. Would it be better to leave the image file name as DCIM202054512.jpg or sean-si-tedx-talk. – the answer is pretty clear, right?

Optimizing the image file name is simple and it works similar to how you would optimize an alt text of an image but a shorter one. Just make sure that the file name of the image clearly defines what is in the photo.
4. Optimize Image Alt Text
The alt text (alternative text) of an image is used by browsers to provide context to users of what an image is about if it cannot properly load it. This is also used by search engines to better understand an image and is an important on-page SEO factor.
Optimizing the alt text of an image means providing a clear description of what the image is. You should also add your target keyword here to better optimize it for rankings as long as it fits the context of an image.
For example, here’s a photo of a condominium for sale in Makati City in the Philippines:
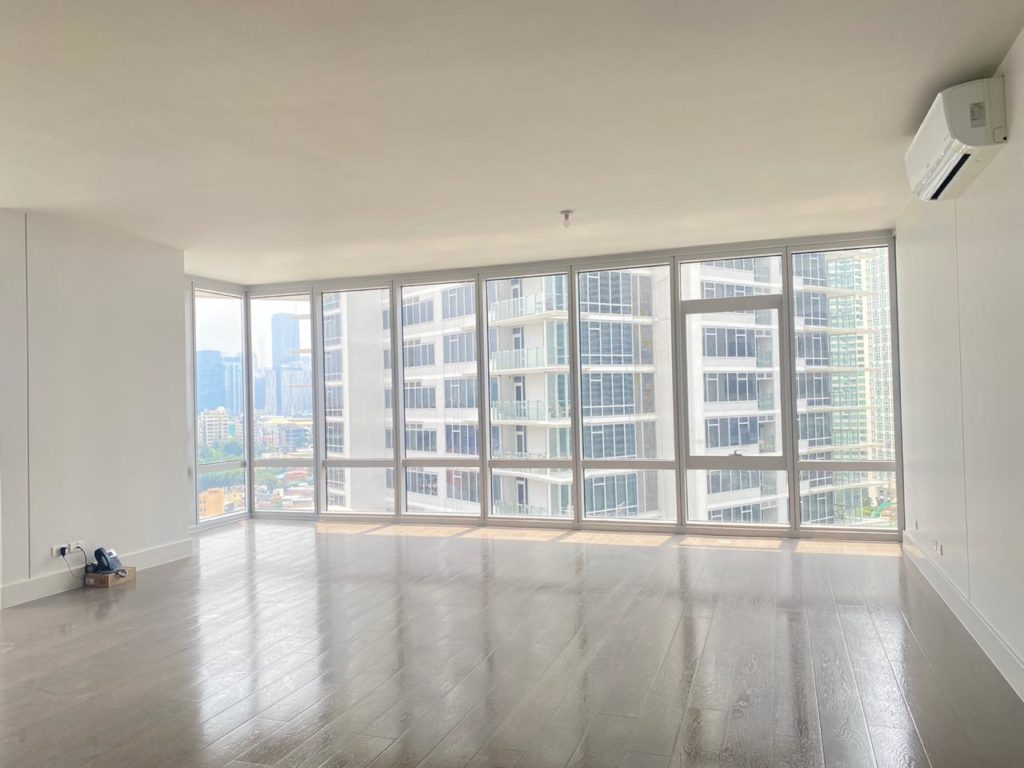
A good alt text that clearly describes the photo and is also optimized for SEO would be “proscenium rockwell sakura tower condominium for sale makati city”. It includes the location of the condominium showed in the image as well as the target keyword which is “condominium for sale makati city”.
5. Provide Context around your Images
Though the image file name and its alt text are used by Google to understand what an image is about, those are not the only things Google looks at. In 2018, Google updated Google images to show not only the URL of the image source but also the page title of the image source to give users more context about the image.
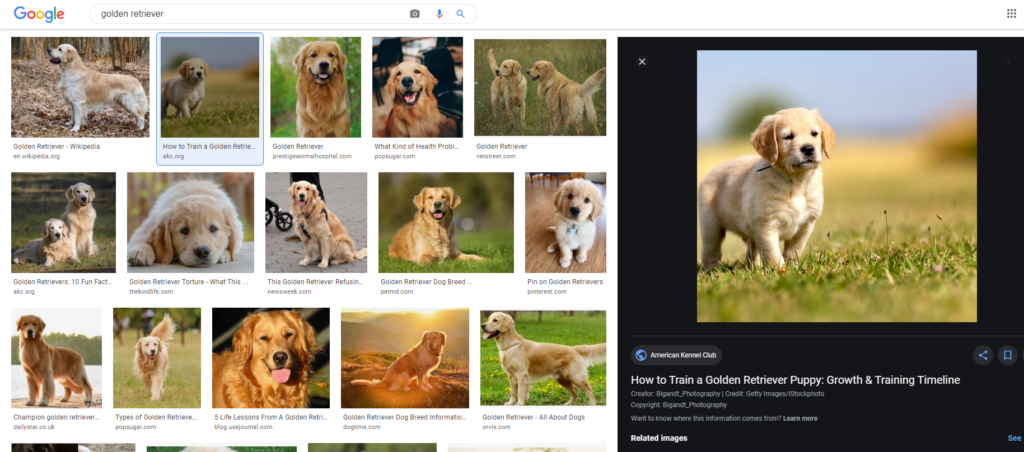
To get this data, Google gets various information from the webpage such as the title tag and meta tags to help it understand what an image is all about and serve users the most relevant images to their search.
6. Add Dimensions
When inserting an image to a page, it is always a good practice to set the width and height of the image. Without a dimension, a browser will not be able to allot a space for it during page load. As a result, some elements of the page may move around from their original places.
This causes a poor score for Cumulative Layout Shift (CLS) which is one of the three metrics in Core Web Vitals. I would also recommend avoiding the use of CSS to style images into a page and just set the dimensions through HTML. You could also just set the width and the browser will automatically calculate the height.
7. Compress your Images
Images carry a lot of weight during page load. Large image file sizes can result in poor loading speeds. That is why it is recommended that you compress your images that could trim off a good chunk of image file sizes. Yes, quality may be reduced but not to a point that is noticeable for average users.
Check out this photo of our team here at SEO Hacker. The first one is the original photo (552kb) while the second one is the compressed photo (442kb 20% compressed).


See the difference? That’s right… There is no difference between the images but there is a difference in page loading speeds.
You could use Google’s PageSpeed Insights to compare the loading performance of webpages with compressed and uncompressed images. PageSpeed Insights can also help you identify which images on the webpage are taking too long to load.
There are a lot of free image compressor tools that are available online. You could also take a look at Imagemin which is recommended by Google because it can compress a wide variety of image format. I highly recommend that you compress your images before uploading them to your website.
But how about images that are existing on your website? Do you have to re-upload all of them? Don’t worry. If you’re using WordPress, you could download plugins that can automatically compress all images on your website. We recommend using WP Smush.
8. Add Structured Data
Marking up your pages with structured data can make your images eligible for rich results and badges that could make your images more visually appealing in the search results and attract more clicks. Currently, only three structured data types for images are accepted by Google. I’ve also included a link to Google’s guidelines that you should follow.
Take note that structured data for images is just like regular search results. It doesn’t affect rankings directly but it could increase your click-through rate.
9. Use an Image Sitemap
XML sitemaps help Google crawl the pages of your website. They usually include URLs only but you could also add images in your XML sitemap or create a separate image sitemap and submit it to Google.
Google automatically crawls images inside posts and pages but there are situations where Google is unable to find images. Creating a separate image sitemap is optional but Google’s bot is more than happy to use it if it’s available.
You could create an image sitemap on your own if you are knowledgeable in web development but if not, I highly recommend that you use image sitemap generators to skip the hassle.
10. Use an Image CDN
An image CDN is a great investment if you want to really boost the loading speed of your website. In general, a CDN or content delivery network distributes your website content/resources to the nearest possible data center location of a user. The closer a server is to a user, the faster a webpage load.
There are quite a few differences between a regular CDN and an image CDN. Not only does image CDN’s improve the delivery times of images but also define other factors such as image format, file size, aspect ratio, and quality.
Using an image CDN can cost you some money but it is definitely recommended for large websites especially those with an international user base.
Image SEO Key Takeaway
Always remember that images are also valuable to SEO and ignoring them would be a waste of opportunity. Just like any strategy in SEO, image SEO takes a lot of time and really it’s all about the small details that matter. Successfully optimizing your images for image SEO could bring substantial traffic to your website and attract backlinks. You could use this strategy to further improve other facets of your SEO campaign.