Prospect.io: An In-depth Review

Email prospecting has been the driving force that has helped our team grow over the past few years, allowing us to be able to reach clients that are looking for our services. When it comes to executing this process, our team usually begins by sending in emails manually and at times, individually.
While our team is able to successfully send in an email to our prospects, the process of doing it manually means that it can be a time-consuming process that could have been more efficient with the right tool. This right tool eventually arrived in the form of prospect.io, which is an email prospecting tool that aims to make the process an efficient and user-friendly experience that would be able to reach more clients in a lesser amount of time.
Before we begin with the in-depth review, we would like to invite you to try out prospect.io yourself and register your account to experience a quality email marketing and prospecting tool.
Getting started
After getting your account registered, Prospect.io will guide you when it comes to setting things up, such as adding contacts, creating lists, adding your sending address, and eventually sending your first set of emails. While having a guide is common on most SEO and digital marketing tools, Prospect.io’s setup guide and checklist are more comprehensive, as it helps you understand each element with more detail.
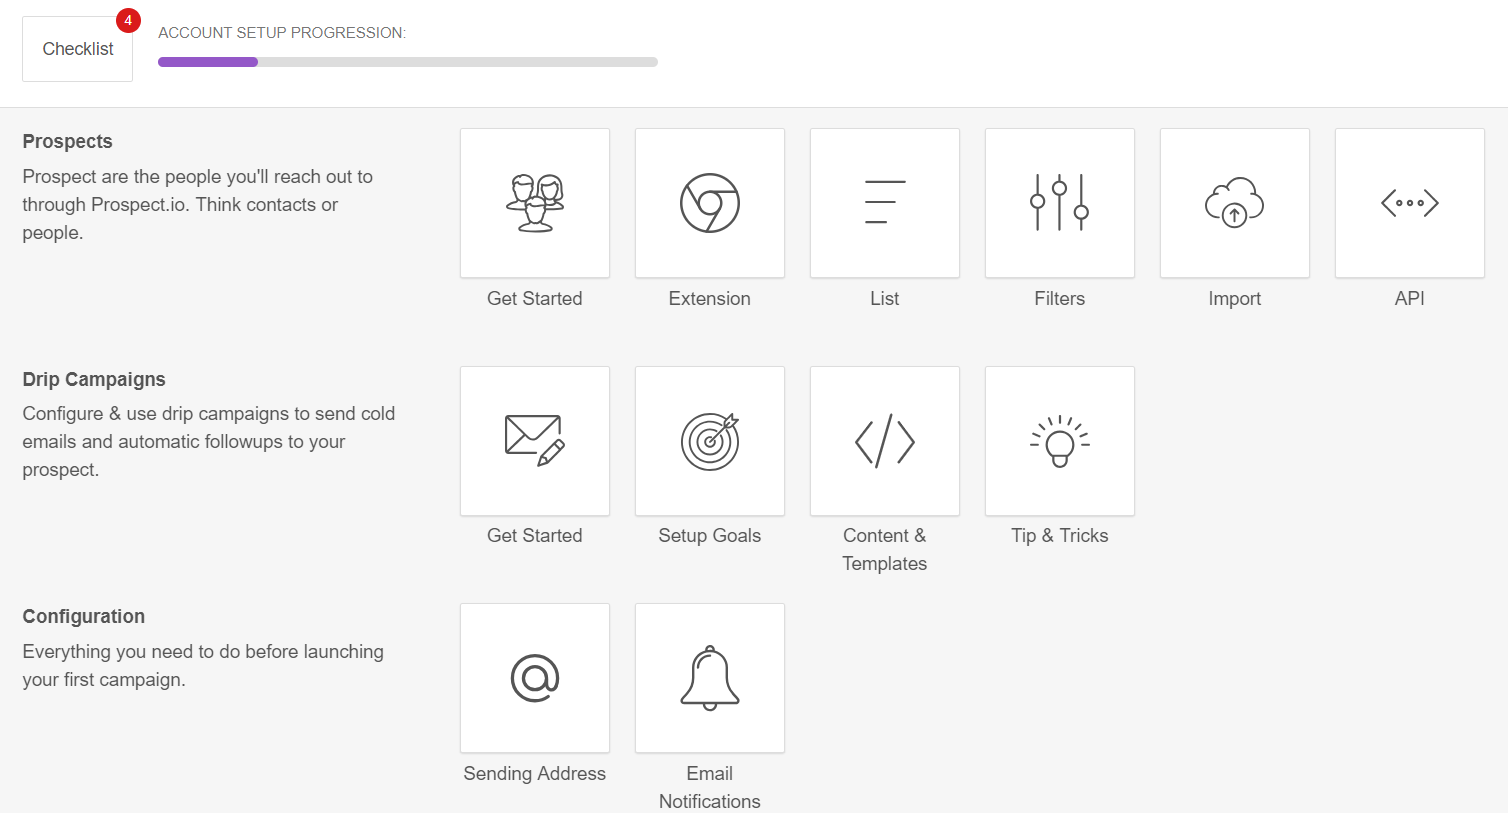
This user-friendly feature is one highlight for me, as it helps make the tool easier to understand, making it much easier for our team to learn and use the tool effectively. The guide can be accessed anytime by clicking on the Explore and Setup button, which means that you can do the same steps repeatedly until you have become familiar with how things work.
Adding Prospects
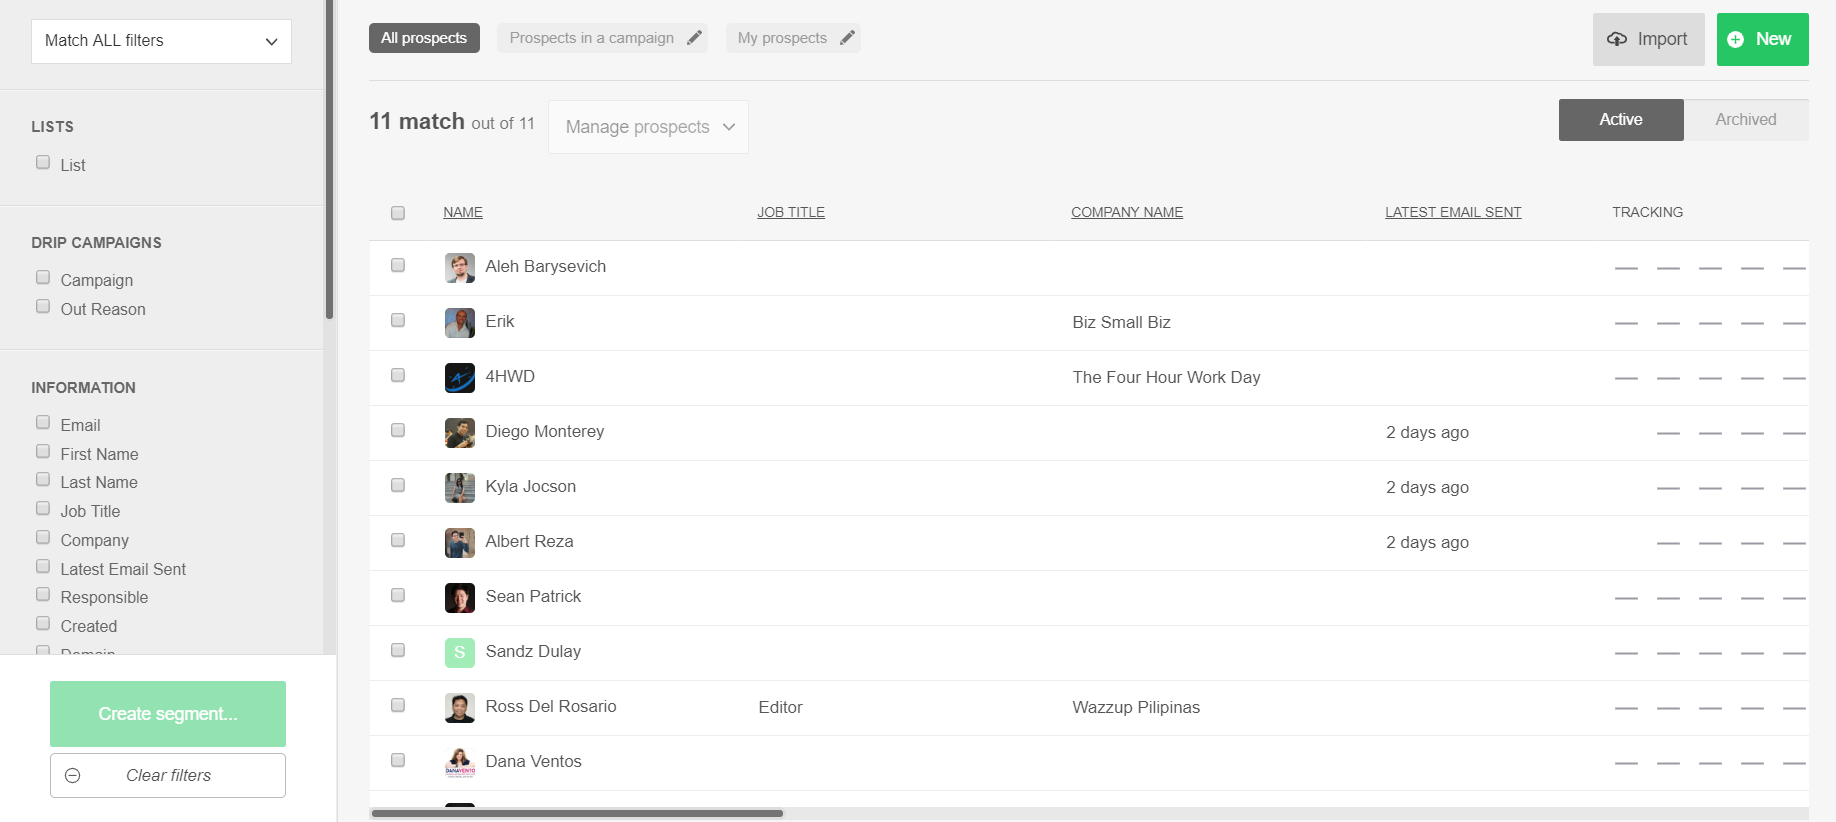
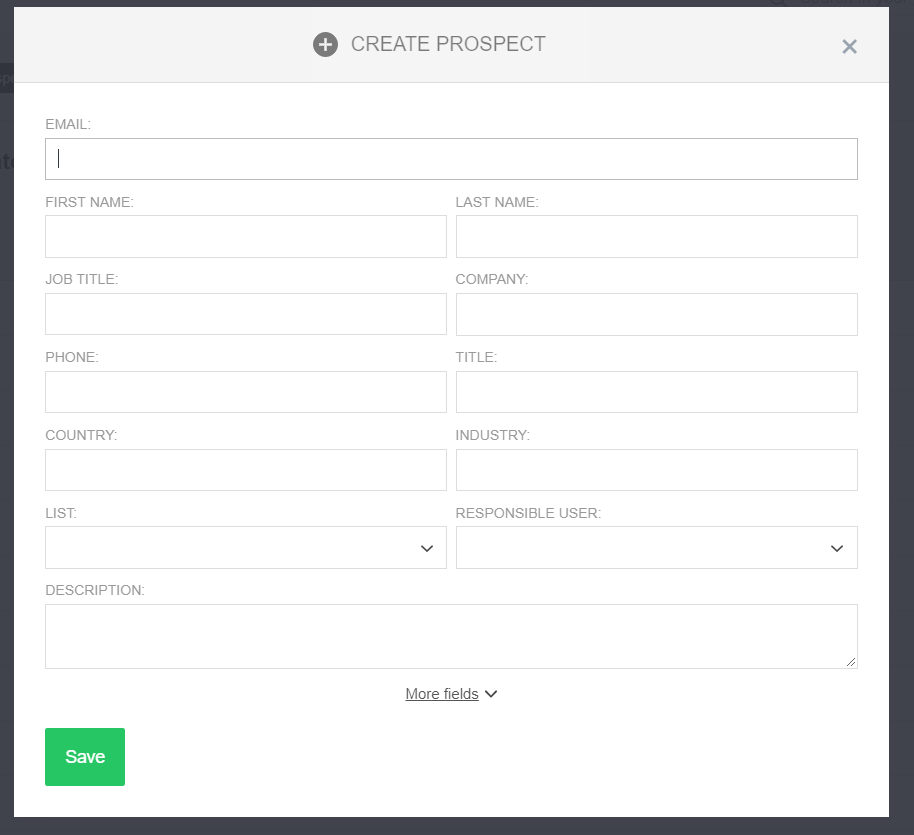
Adding prospects in Prospect.io is simple, as you only need to click on the Create Prospect button (the green plus sign on the top corner). From there, you can add information such as the name of the prospect, company name, industry, phone number, country, and job title, and a short description.
After adding the prospect, you can track the emails that they have received, and see the time that the last email was sent. You can also filter your prospects through each category as well. For example, I can filter out prospects from the digital marketing industry or filter them by job title. This allows me to be able to target a specific set of prospects and make sure that I would not be sending any emails to the wrong person.
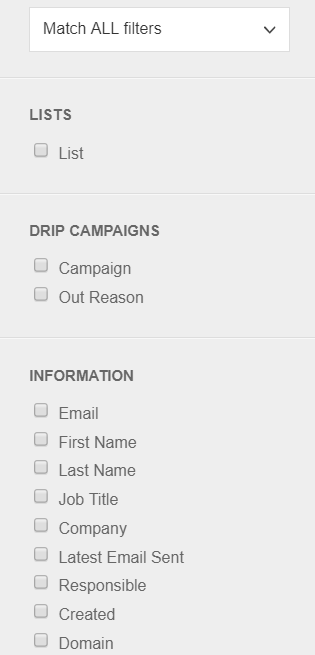
List
The second section is the Lists, which allows you to create a list each set of prospects for a specific email campaign. This allows you to monitor each set of prospects accordingly, and make sure that they would be receiving the right emails. You can also view active and archived prospects and monitor each account in that campaign. This makes sure that your email listings are more organized, and each prospect is in the right spot.
Drip Campaign
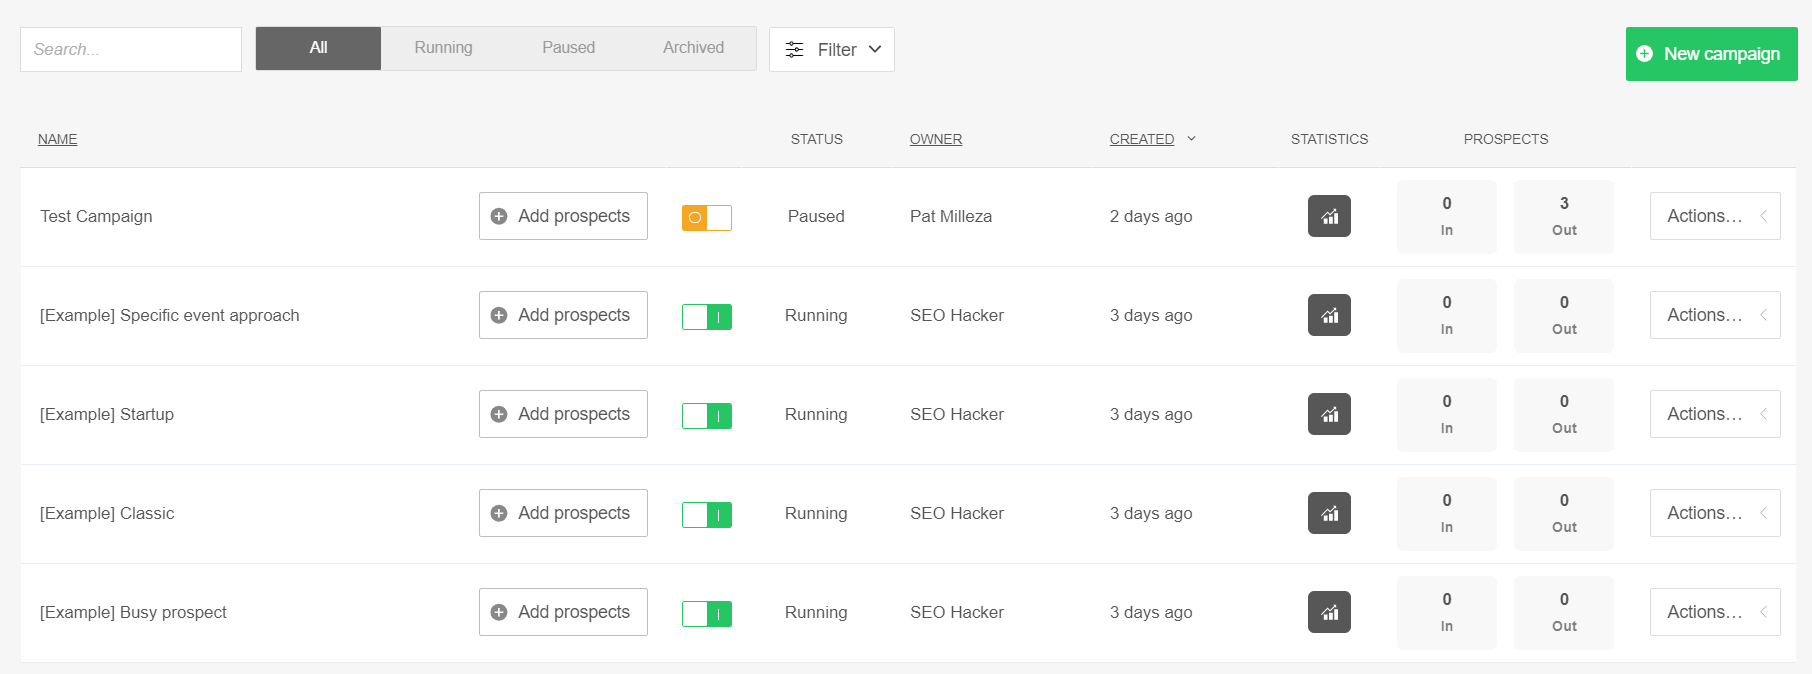
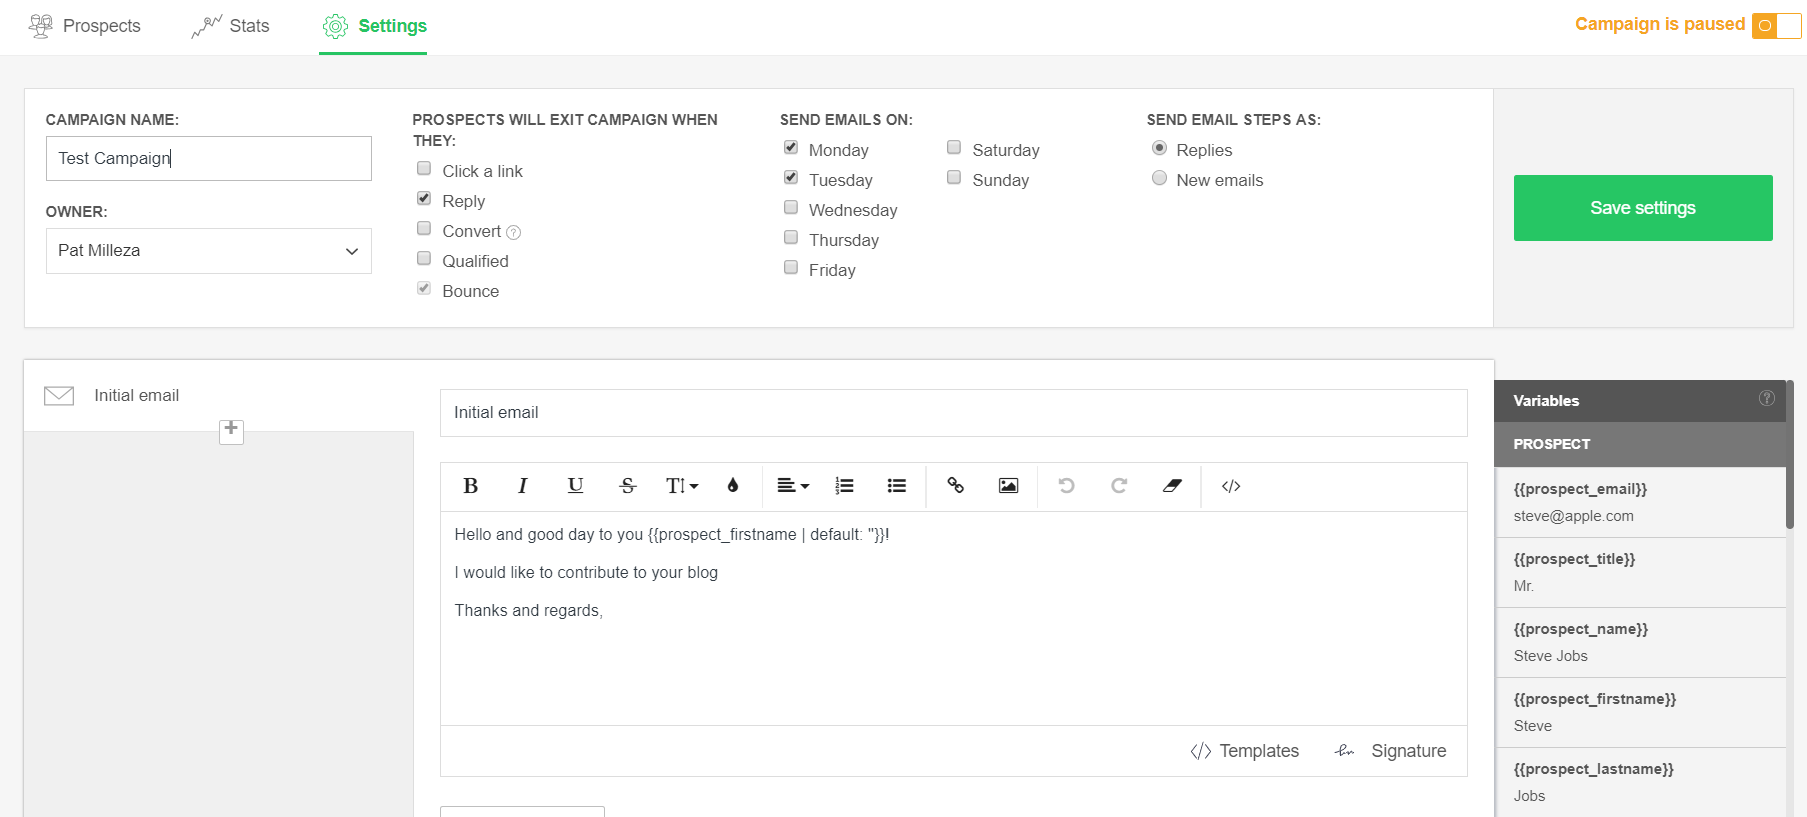
The next and perhaps most important feature is the drip campaign. This is where you would be setting up your email campaigns and send them to the right prospects. To begin, all you have to do is to compose your email, and then name your campaign.

Along with composing your email, you also have the option of selecting options such as when prospects exit your campaign, what days would the emails be sent, and whether or not you want to send the email step as a reply or new email.
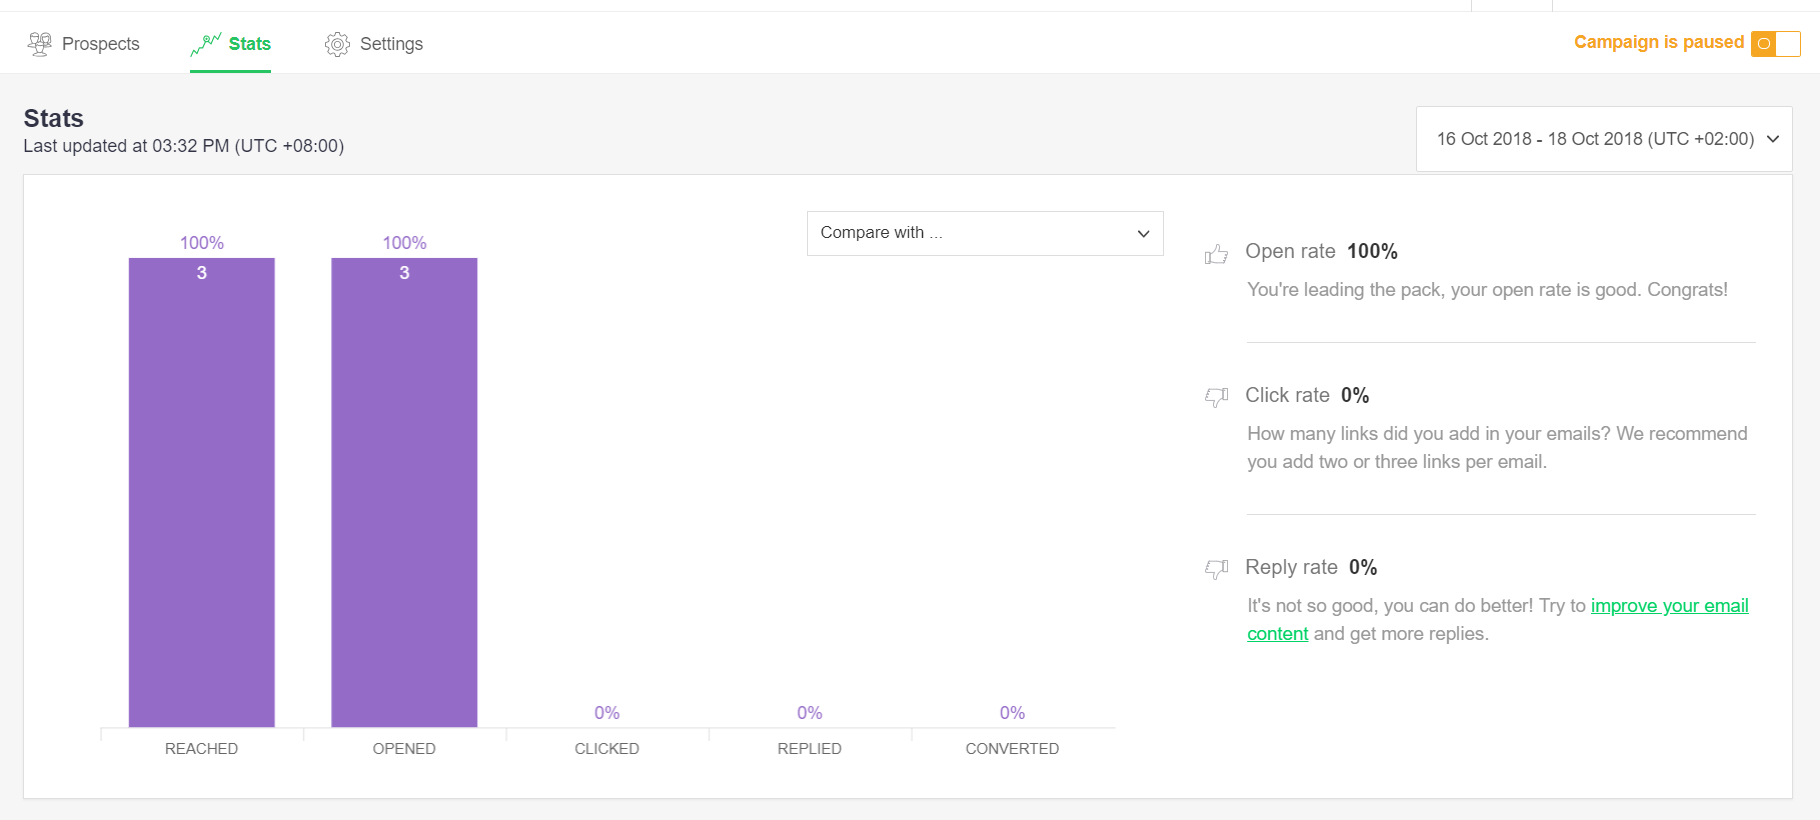
After starting your campaign, you can choose to keep it active or have it paused. You can also view the statistics of the campaign, allowing you to see how many prospects were able to receive and respond to your emails.
Reports
The Reports section is similar to the statistics found on the Drip Campaign and shows you the number of emails sent. You can also see the number of contacted prospects, conversions, and bounces. You can also view specific statistics of each list to see which campaign is more successful. You can also filter the report by selecting a specific timeframe and select contacts.
Chrome Extension
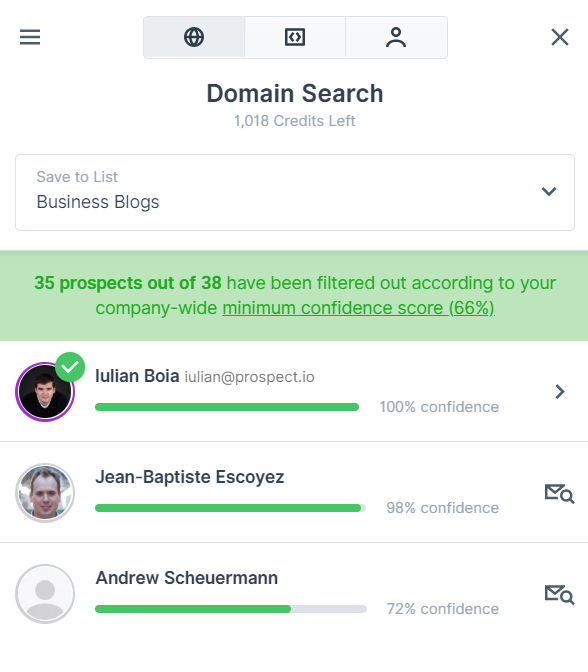
Prospect.io also has a Google Chrome extension, which allows you to search and add prospects while browsing all over the internet. This comes in handy when looking through business listings and company websites, as you can instantly create a list of contacts that you can send articles to.
Verdict
User-friendly and efficient Prospect.io is an email campaign tool that makes the process of sending emails to specific groups a much easier process. With a clean user interface that helps you step by step, this is a very reliable tool that makes sending emails a much better experience. I’d definitely recommend this for link builders, social media specialists, and SEO professionals, and include it as a part of our growing SEO toolbox.
Key Takeaway
Email campaigns are a huge part of our growth and continued success as a company, and tools like Prospec.io help contribute to this growth. The latest addition to our SEO toolbox is a sure time-saver that makes us do more and reach out to a wider audience.
If you have questions and inquiries about SEO tools and SEO in general, leave a comment below and let’s talk.